Hardware
Raspberry Pi 4B RAM 4GB
I initially purchased the largest RAM available, later by testing the performances I understood that 2GB, and maybe even 1GB could be enough for my application

X400 V3.0 + case
This great card, along with a nice little box that can stay anywhere, gives you the possibility to use the 192 kHz of the PRO version and an amplifier with 30W per channel.


Fan + Heat sink
I choose this single fan heat sink, but I’m still testing this solution since for intense use it can be undersized. It is not so silent, however.

As indicated by Geekworm connect the fan to the pins 04 and 06 of the X400
Power adaptor for X400
Suptronics says that the card can accept any voltage from 6V to 26V. I choose an inexpensive power adaptor 24V 2A with a 5.5 x 2.5 mm connector that may accept different socket cables.

SD card 16 GB
To fit the small size of the system even a 4GB card would be enough, but nobody sells it anymore.

Installing the system
To install the OS I used my laptop with Ubuntu. Most of the operation can be done also with a Windows machine, except writing to the root partition with the ext4 filesystem. To do it you may run a virtual machine with Virtualbox, Ubuntu images ready to use can be found online easily.
Assemble the cards
If you do not have an USB power adaptor of at least 3A output and a C-type cable you must power on your RP4 via the X400 assembling them together and connecting the power adaptor to the latter. Remember to NEVER connect a power adaptor to your RP4 when it is powered via the X400.
Download Raspbian and install
Download the latest Raspbian Lite from here.
Insert the card in your laptop and check the device name from terminal running the command:
lsblk -pusually your card should appear as /dev/sdb. You may then flash the image just downloaded by running the following command:
unzip -p 2019-09-26-raspbian-buster-lite.zip | sudo dd of=/dev/sdX bs=4M conv=fsyncreplacing in the name of the file zip you just downloaded and the device name instead of sdX. When finish run:
syncThis will ensure that the write cache is flushed and that it is safe to unmount your SD card.
When you finish you have the card ready with the system to be booted in the RP4. Since your system is headless you will use SSH to gain access to it. Raspbian developers prepared something good for you, the SSH server can be enabled just by placing a file named ssh, without any extension, onto the boot partition of the SD card. All you have to do is mount the SD card on your laptop; if you have Ubuntu or any other recent distribution installed the partitions will be automagically mounted as /media/USER/BOOT and /media/USER/ROOTFS, lsblk -p will help you to find the actual names. Now you shall create the file using the command:
sudo touch /media/USER/boot/sshYou may then see the empty ssh file in your boot directory.
In order to connect via SSH you need as well a network connection. If you have any WiFi available, with the card still connected your laptop add the lines in bold to the file /media/USER/ROOTFS/etc/wpa_supplicant/wpa_supplicant.conf (replace USER and ROOTFS with the corresponding directories in your machine)
/etc/wpa_supplicant/wpa_supplicant.conf
ctrl_interface=DIR=/var/run/wpa_supplicant GROUP=netdev
update_config=1
country=CN
network={
ssid="YOUR_SSID"
psk="YOUR_PASSWORD"
}
Adjust country code and SSID credentials as per your case.
Another option is to enable a dhcp server on your laptop and connect the RP4 to it via Ethernet cable.
Start the system
Insert the SD card in the slot of your RP4, power on and wait few minutes. The system will be automatically rebooted to expand the image to fit your card’s size. You may notice it by looking the green led flashing several times, when at the end will remain only the red led lit on the system should be ready waiting for your connection. You may connect with the following command:
ssh pi@raspberrypi.localIf for some reason SSH cannot identify the hostname you may need to check the IP address. If for example your wifi router’s address, or dhcp server host address, is 192.168.1.1 you may use nmap as follow:
nmap 192.168.1.0/24Update the system
Once you have the console of your Raspberry available you are ready to update the system to the most recent version of the software. In order to do that it could be convenient to identify the closest mirror to you. You may find a list of mirrors on Raspbian site. Unfortunately this list do not cover the Foundation repository recorded in the file /etc/apt/source.list.d/raspi.list. Until today the only way I had to find such mirrors is to check the tree of the Raspbian mirrors to find one that contains the debian repository.
I’m living in China, and my lists looks as follow:
/etc/apt/sources.list
deb http://mirrors.zju.edu.cn/raspbian/raspbian/ buster main contrib non-free rpi

#deb http://raspbian.raspberrypi.org/raspbian/ buster main contrib non-free rpi
#Uncomment line below then 'apt-get update' to enable 'apt-get source'
#deb-src http://raspbian.raspberrypi.org/raspbian/ buster main contrib non-free rpi#
/etc/apt/sources.list.d/raspi.list
deb http://archive.raspberrypi.org/debian/ buster main

#Uncomment line below then 'apt-get update' to enable 'apt-get source'
#deb-src http://archive.raspberrypi.org/debian/ buster main
Now you are ready to update your system by using the commands:
sudo apt-get update
sudo apt-get dist-upgrade
Bring in ancillaries
VNC
Installing VNC server will be as easy as running raspi-config from terminal, go to the Interfacing Options submenu, choose VNC and confirm on Yes.

This will install several additional packages to enable the VNC server.
CPUFreq
You need this utility to be able to change the CPU mode before starting Pianoteq. You may install it using the following command:
sudo apt-get install cpufrequtilsPianoteq
Copy the software
The easiest way I found is to download the software on your laptop, unzip it there, eliminate the subdirectories not necessary, such as amd64/, i386/ and Documentation/, and transfer the remaining files by using the following command from a new terminal of your laptop:
scp –r Pianoteq\ 6 pi@raspberry.local:/home/pi/you will be asked for the password of Raspberry, then the files will be copied over.
Starting script
To prevent the CPU frequency throttling and cause problems to Pianoteq, I followed Edgar suggestion to create a starting script as follow:
/home/pi/Pianoteq 6/arm/ Pianoteq 6.sh
#!/bin/bash
sudo cpufreq-set -c 0 -g performance
sudo cpufreq-set -c 1 -g performance
sudo cpufreq-set -c 2 -g performance
sudo cpufreq-set -c 3 -g performance

/home/pi/'Pianoteq 6'/arm/'Pianoteq 6' --fullscreen --multicore max

sudo cpufreq-set -c 0 -g ondemand
sudo cpufreq-set -c 1 -g ondemand
sudo cpufreq-set -c 2 -g ondemand
sudo cpufreq-set -c 3 -g ondemand
I also created another one to be able to start Pianoteq in headless mode:
/home/pi/Pianoteq 6/arm/Pianoteq 6h.sh
!/bin/bash
sudo cpufreq-set -c 0 -g performance
sudo cpufreq-set -c 1 -g performance
sudo cpufreq-set -c 2 -g performance
sudo cpufreq-set -c 3 -g performance

/home/pi/'Pianoteq 6'/arm/'Pianoteq 6' --headless --multicore max

sudo cpufreq-set -c 0 -g ondemand
sudo cpufreq-set -c 1 -g ondemand
sudo cpufreq-set -c 2 -g ondemand
sudo cpufreq-set -c 3 -g ondemand
I turned both files executable by running the commands:
sudo chmod +x /home/pi/Pianoteq\ 6/arm/ Pianoteq\ 6.sh
sudo chmod +x /home/pi/Pianoteq\ 6/arm/Pianoteq\ 6h.sh
VNC setup
In order to start Pianoteq at VNC startup I created the file:
/home/pi/.vnc/xstartup
#!/bin/bash
/home/pi/'Pianoteq 6'/arm/'Pianoteq 6.sh'
You should make it executable by using the command:
chmod +x .vnc/xstartupAfter that using the command:
vncserveryou will see the server starting messages. The last line will tell you the address and virtual desktop offered by your server:
…
New desktop is raspberrypi:1 (192.168.1.50:1)
For some reason the default VNC viewer in Ubuntu, Vinagre, is showing only a black desktop. Instead the Android app VNC Viewer works like a charm and I can easily control the Pianoteq GUI from there, as well as VNC Viewer for Windows.
By closing the application from the GUI the vncserver will be automatically terminated and shall be restarted. You may also stop the server using the command:
vncserver –kill :1Pianoteq headless as a service
After configuring Pianoteq with the GUI you may want to run it headless to just play the instrument you choose. In order to start and stop Pianoteq headless I used the nice Systemd of Debian. I created the starting file as follows:
/home/pi/Pianoteq 6/arm/pianoteq.service
[Unit]
Description=Pianoteq headless

[Service]
Type=simple
User=pi
ExecStart=/bin/bash /home/pi/'Pianoteq 6'/arm/'Pianoteq 6h.sh'

[Install]
WantedBy=multi-user.target
Change the permits of this file with the following command:
chmod 644 /home/pi/Pianoteq\ 6/pianoteq.serviceI create a symlink of this file in in the systemd directory using the command:
sudo ln –s /home/pi/Pianoteq\ 6/arm/pianoteq.service /etc/systemd/system/pianoteq.serviceNow it is possible to start and stop Pianoteq headless using the following commands:
sudo systemctl start pianoteq
sudo systemctl stop pianoteq
Pianoteq setup
I enabled the driver for the X400 and disabled the ALSA driver by modifying in /boot/config.txt the lines highlighted in yellow:
/boot/config.txt
…
# Additional overlays and parameters are documented /boot/overlays/README
dtoverlay=iqaudio-dacplus

# Enable audio (loads snd_bcm2835)
# dtparam=audio=on
…
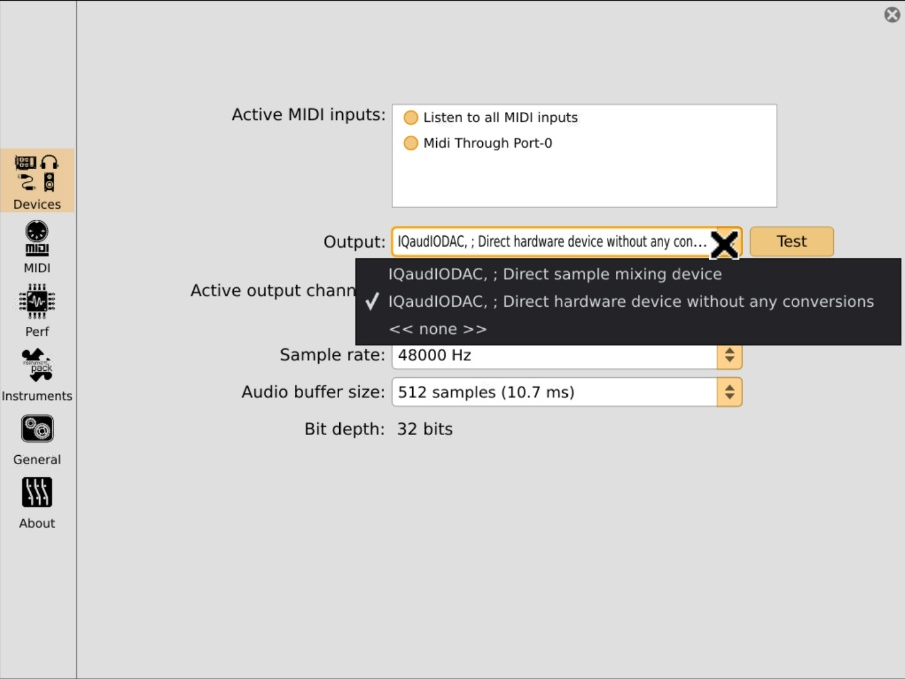
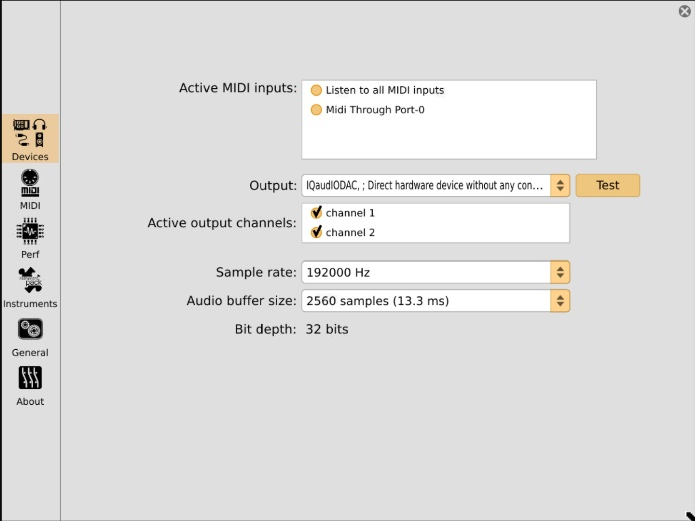
after a reboot the driver will appear in Pianoteq under Option/Devices

Choose “IQaudIODAC, ; Direct hardware device without any conversions”.
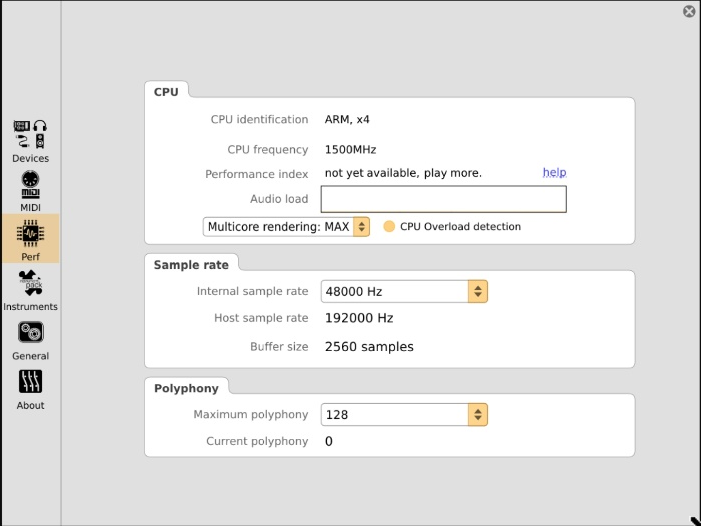
I’m neither an expert of virtual instruments nor an advanced piano player therefore to start I set the option of Pianoteq as per Edgar’s suggestion:


As recommended by developers I also configure the following:
1 – disable the turbo mode of the Ethernet port to ensure more stability of the system once stressed by Pianoteq, by adding in /boot/cmdline.txt the part in bold:
/boot/cmdline.txt
console=serial0,115200 console=tty1 root=PARTUUID=6c586e13-02 rootfstype=ext4
elevator=deadline fsck.repair=yes rootwait smsc95xx.turbo_mode=N
2 – elevate the privileges of the group audio by adding the following lines:
/etc/security/limits.conf
...
@audio - rtprio 90
@audio - nice -10
@audio - memlock 500000
Utilities
Raspberry SSH
In order to automatize the start and stop of VNC’s Pianoteq and headless Pianoteq I found this fine application that can be used to start and stop all the processes, including shutdown the RP4 before power off.

In the Btn Cmd field you may specify the commands as you were in the terminal, they will be executed and if you tick mark the option it will give you also the output.
Backup with image-utils
In order to keep a spare image to recover the system I found useful the image-utils scripts developed by RonR and published in the Raspberry forum. They allow to make backup of the system while running and even perform an incremental backup using an existing image backup.
You may transfer the files to your RP4 using scp as follow:
scp -r image-utils pi@raspberrypi.local:/home/pi/and make the scripts executable using the command:
chmod 755 /home/pi/image-utils/*Plug in now an USB disk to the RP4 and mount it with a command similar to:
sudo mount /dev/sda /mntyou then start the backup just using the command:
/home/pi/image-utils/image-backup